I recently pulled out this sketch book of watercolor paintings for a watercolor workshop I did for high school students. Before demonstrating a few key techniques in applying watercolor, I presented several examples of watercolor illustrations and personal works I had done in explaining the different ways of applying watercolor for various effects and styles.
These are just a few paintings I did while I was in Pont l'Abbe, N.France (Translation: Bridge to the Monk) and Galicia, N.Spain during the summer of 2006.
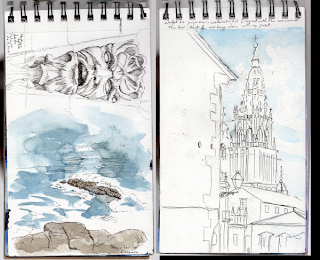 The page to the left was done at the bottom of a very high cliff in Galicia, Spain. This coastline is called the End of the Earth. My favorite story on how this location received it's name is the fact that it is the furthest west of the European continent. Therefore, during the time when the public considered the earth flat, they assumed that they could see...The end of the Earth at the horizon. Furthermore, they believed that when the ships would sail beyond the horizon, the ships would fall of the earth and perish.
As for the page on the right, I was sitting alone, outside at a restaurant table, drinking a coffee and drawing the church, peeking through two buildings. My intention was to paint the whole page in color, but the older waitress and I got into an argument over me possibly making a mess on her table if I used my watercolors. Despite leaving with a unfinished painting, I have fond memories of defending my cleanliness to a Spaniard in a language a barely knew.
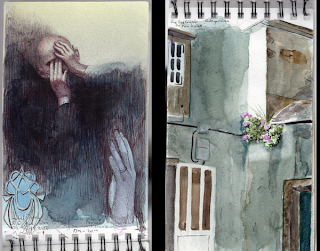 The page on the left was one of the first drawings I did in the sketch book. This page sure is dark and somber. I still recall how burnt out and exhausted I was when I began my vacation in France/Spain.
On the right was one of the last paintings I did in this sketch book. This page is much more upbeat. I obviously returned to the US in a much better mood. As I walked in this unknown town called Galicia, I purposely got lost in the narrow streets and discovered this amazing plant bathing in the sun. Growing from the crack within this outside wall, the flower discovered one of the few places the sun can beam within the street. So lucky I am to have discovered the flower's discovery.


